When your central AC unit suddenly stops working on a hot summer day in the GTA, it can feel like an emergency.
Before you panic or immediately call for an AC repair professional, there are several troubleshooting steps you can take that might get your system running again.
Here’s your complete guide to diagnosing and potentially fixing common air conditioner problems.
Table of Contents
Step 1: Check the Obvious Culprits First
Thermostat Issues

The most common cause of AC problems isn’t mechanical failure—it’s thermostat settings. Here’s what to check:
- Temperature setting: Ensure your thermostat is set to “Cool” and the temperature is set lower than the current room temperature
- Fan setting: Make sure the fan is set to “Auto” rather than “On”
- Batteries: If you have a programmable thermostat, replace the batteries
- Programming: Check if someone accidentally changed the schedule or settings
Power Supply Problems
Your air conditioner system requires power to multiple components:
- Circuit breaker: Check your electrical panel for tripped breakers. The air conditioning system typically has two breakers—one for the indoor unit and one for the outdoor unit
- Emergency shutoff switch: Look for a switch near your indoor unit that may have been accidentally turned off
- Outdoor disconnect: Check the electrical disconnect box near your outside AC unit
Step 2: Inspect Your Air Filter

A clogged air filter is one of the leading causes of air conditioner system failures. When airflow is restricted:
- The system works harder and less efficiently
- Components can overheat and shut down
- Ice can form on the evaporator coils
What to do:
- Locate your air filter (usually in the return air duct or near the indoor unit)
- Remove and inspect it—if you can’t see light through it, it needs replacement
- Replace with a new filter of the same size
- Wait 30 minutes before turning the system back on
Step 3: Check for Ice Buildup
If you see ice on your indoor evaporator coils or outdoor AC unit, this indicates a serious problem that requires immediate attention.
If you discover ice:
- Turn off your AC system completely
- Turn the fan to “On” to help melt the ice
- Do not attempt to chip or melt the ice with tools or hot water
- Call a professional—ice formation usually indicates refrigerant issues, airflow problems, or other serious concerns
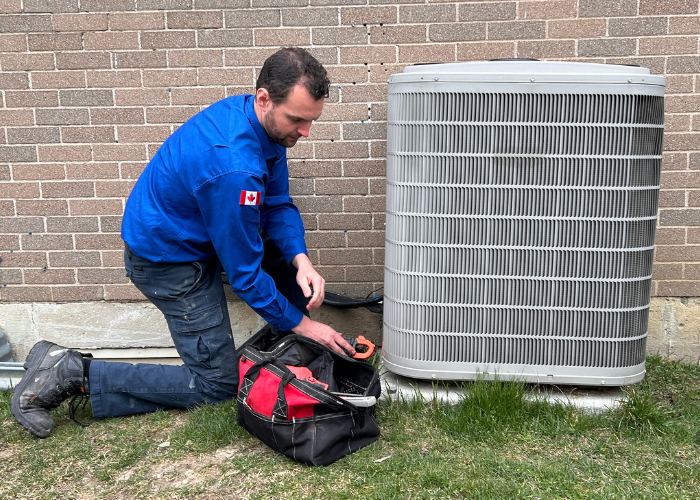
Step 4: Inspect the Outdoor Unit

Your outdoor condenser unit needs proper airflow to function effectively:
- Clear debris: Remove leaves, grass clippings, and other debris from around the unit
- Check for damage: Look for bent fins, damaged components, or signs of animal interference
- Ensure proper clearance: Make sure there’s at least 2 feet of clearance around all sides of the unit
- Clean the unit: Gently spray the condenser coils with a garden hose to remove dirt buildup
Step 5: Examine Ductwork and Vents
Poor airflow can cause your AC system to malfunction:
- Check all vents: Ensure supply and return vents aren’t blocked by furniture, curtains, or debris
- Inspect visible ductwork: Look for obvious damage, disconnections, or excessive dust
- Feel for airflow: Put your hand near vents to check if air is flowing when the system runs
When to Call Dr HVAC & Plumbing

While these troubleshooting steps can resolve many common issues, some AC problems require professional diagnosis and repair. Call us immediately if you experience:
Electrical Issues
- Frequently tripping circuit breakers
- Burning air conditioner smells
- Sparks or unusual sounds from electrical components
- Complete system failure despite troubleshooting
Refrigerant Problems
- Ice formation on coils
- Hissing sounds (potential refrigerant leak)
- Air conditioning system running but not cooling
- Higher than normal energy bills
Mechanical Failures
- Unusual noises (grinding, squealing, banging)
- AC fan not running
- Compressor not starting
- Water leaking around indoor unit
Complex System Issues
- Short cycling (system turning on and off frequently)
- Inconsistent cooling throughout your home
- Persistent high humidity despite air conditioner operation
- Systems older than 10-15 years with recurring problems
Emergency AC Service in the GTA
At Dr HVAC & Plumbing, we understand that air conditioning unit failures don’t wait for convenient times. That’s why we offer emergency HVAC services throughout Brampton, Toronto, Mississauga, Georgetown, and surrounding GTA areas.
Our certified technicians are experienced with all major brands including Trane, Bryant, Goodman, RunTru, and Napoleon systems. We carry common replacement parts on our service vehicles, which means we can often complete repairs in a single visit.
Prevention is Key

The best way to avoid air conditioner emergencies is through regular maintenance:
- Change filters regularly: Every 1-3 months depending on usage and filter type
- Annual professional maintenance: Schedule tune-ups before the cooling season begins
- Keep outdoor units clean: Regular cleaning extends system life and improves efficiency
- Address small problems quickly: Minor issues often become major repairs if ignored
While air conditioning problems can be frustrating, many common issues have simple solutions you can try yourself. Start with the basics—check your thermostat, power supply, and air filter. Inspect your outdoor unit and ensure proper airflow throughout your system.
However, don’t hesitate to call professionals when the problem is beyond basic troubleshooting. Attempting complex repairs yourself can lead to more expensive damage or safety hazards.
At Dr HVAC & Plumbing, we’re here to keep your family comfortable throughout the hottest days of the year. Whether you need emergency repairs or routine maintenance, our team is ready to provide reliable, professional service across the Greater Toronto Area.